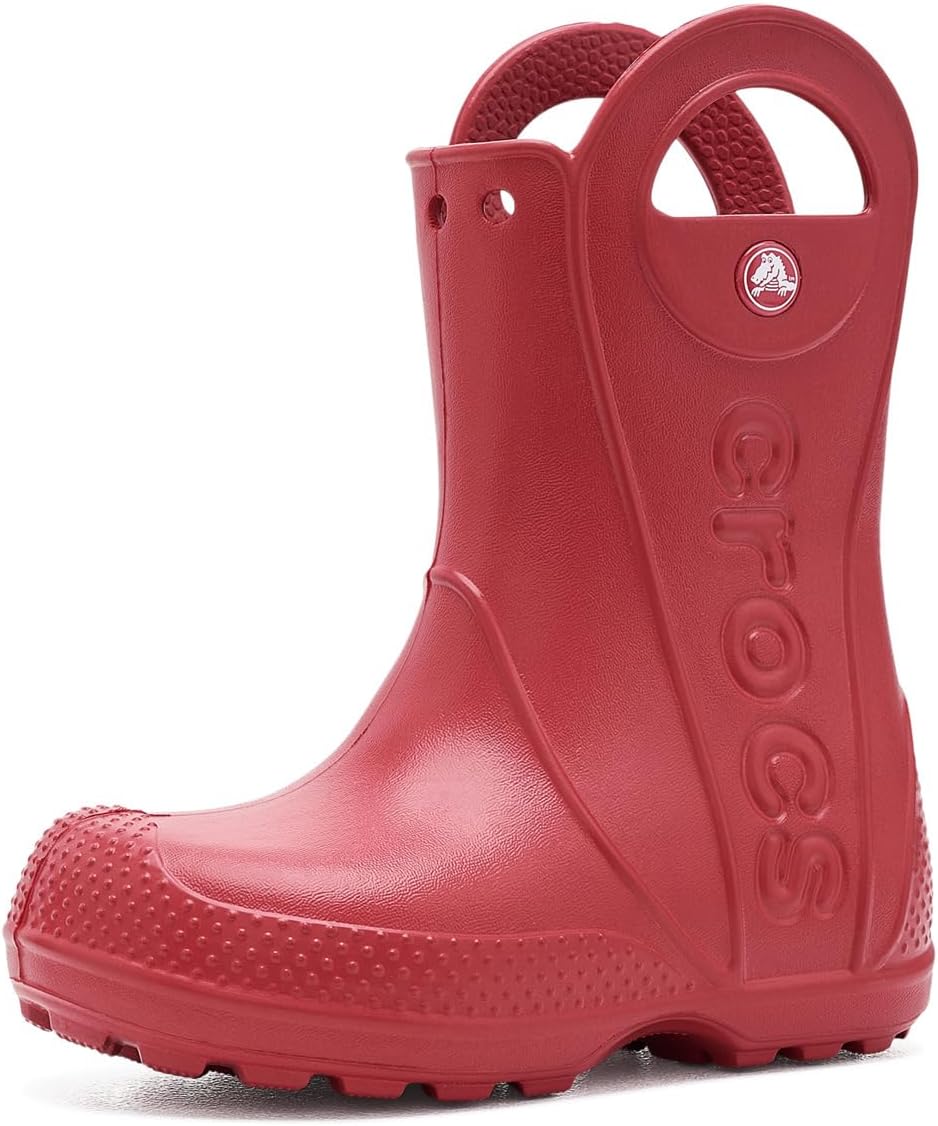
Crocs
Kids' Handle It Rain Boot
rain boot · pull-on handles
Amazon link availableSeasonal & Weather Shoes
Fit toddler rain boots by checking toe room, shaft and instep space, heel movement, sock volume and walking behavior across the full wet-weather route.
Toddler rain boots should let the toes lie flat, accommodate the intended sock without compressing the forefoot or instep, and keep the heel centered enough for controlled walking. Because many are pull-on and less adjustable than sneakers, evaluate heel lift, shaft contact and the distance the child must walk—not just room at the toe.
Define the boot's job before interpreting its loose-looking silhouette. A five-minute backyard puddle session allows quick changes and little distance. A walk to preschool adds pavement, curbs, stairs and an indoor handoff. A farm visit may include mud that tugs at the boot. Write down the longest continuous walk, whether the child will stay in the boots indoors and which socks are planned. A fit that seems acceptable for standing at the door can fail during the approach and return.
Also verify that the model's stated use matches the expected water and temperature. Rain boots are not automatically insulated, and a tall shaft does not make every depth appropriate. If conditions are cold, choose the sock and boot system as a whole instead of filling a mild-weather shell with unplanned layers. Keep a dry alternative available when the route exceeds the boot's practical job.
Remove packing material and check that any footbed lies flat. Use handles only as designed; they are not evidence that the opening will suit every instep. With the intended sock on, guide the foot in without forcing toes downward or crushing the heel. The foot should pass the throat and settle onto the footbed with the heel at the rear. Repeated hard pushing can hide a narrow opening or insufficient instep volume.
Listen and observe as the foot enters. A trapped sock may twist, bunch at the toe or pull tight around the heel. Straighten it before judging size. Fit both boots because one foot can be larger or higher-volume. If entry is easy only in a much longer size, compare a different opening or boot shape. Added length is a poor repair for a throat that does not accommodate the foot.
The exterior toe cap often extends beyond usable space, so do not judge by the visible shell. Use the exact maker's chart and its stated allowance. If the insole is designed to be removed, the manufacturer may provide a fit method; follow that method without treating the insole outline as a complete replica of the upper. With the child standing, confirm the longest toe is not contacting the front and the toes are not curled.
Look for side pressure where the forefoot is widest. A shell that visibly bulges or a child who resists only after weight-bearing may need a different width or shape. Going longer can move the widest part of the boot ahead of the widest part of the foot while increasing heel travel. Toe room, width and heel security have to coexist. A roomy category name cannot substitute for checking all three.
Pull-on rain boots often allow more visible internal movement than shoes with adjustable closures. The question is whether the heel remains controlled enough for the route. Watch from behind while the child walks straight, turns and steps over a low threshold. Notice repeated heel pumping, audible slapping, the foot rolling toward a side or toes gripping to keep the boot attached. One minor rise of the shell is different from the foot repeatedly losing its position.
Do not use an extra-thick sock or added insole as an improvised permanent filler unless the boot maker specifies that setup. It can reduce toe and instep space while leaving the underlying shape mismatch. If the heel lifts substantially, compare another size only when length evidence supports it; otherwise try a model with a different heel cup, shaft, opening or adjustment feature.
A rain boot also fits above the foot. Check the shaft opening with the pants arrangement planned for rain. It should not pinch the calf, trap a thick wad of fabric or leave a hard edge pressing into the leg. Then ask the child to crouch or pick up a familiar object. Observe whether the front edge drives into the shin or the rear edge catches behind the knee. A taller boot offers more coverage only when its height works with the child's proportions and movement.
Walking can create friction even without a tight-looking shaft. After a short clean trial, remove both boots and check the sock and skin for concentrated rubbing. Pants tucked inside can create seams and folds; pants outside can direct water differently depending on the setup. Arrange clothing deliberately and repeat the movement check rather than assuming the boot alone controls every opening.
Set out the rain clothes, intended socks, boots and dry backup exactly as they would appear on a wet morning. Have the caregiver who usually handles departure put the system on without rushing. Walk from the entry across a clean indoor route, turn, crouch and remove the boots. Time is not the score; the rehearsal reveals whether socks bunch, pant legs conflict with handles, the opening resists the foot or the child cannot manage ordinary steps in the complete outfit.
Imagine the same system after the boots are muddy. Where will they be removed, and can the child step into dry shoes without standing in wet socks? A tray, seat, towel and labeled backup pair may improve the day more than a nominal feature. Fit includes repeatable use: a boot that only seats correctly after several forceful attempts is not a reliable morning choice.
Keep the pair for the planned route when toes and forefoot remain uncompressed, the instep is not pressured, heel movement stays controlled, the shaft does not rub and the sock setup works. Change the size when reliable length evidence shows the current choice is short or clearly excessive. Change the model when opening, width, volume, heel or shaft geometry fails despite plausible length. Do not keep a poor fit as a future growth boot.
A pair that is manageable only for a brief backyard task may be reserved for that narrow job rather than promoted to a walking boot, provided it still fits safely and the child is supervised. Recheck before the season and during it because rain boots may be worn intermittently while feet change. Clean and dry them as directed, inspect the lining and footbed, and repeat the sock-specific fit before the next long route.
Reviewed model starting points
These model families link to Amazon listings. Check the selected size, width and color because availability and features can vary.
Crocs
rain boot · pull-on handles
Amazon link availablePull-on boots may show more movement than adjustable shoes, but repeated heel pumping, slapping, sideways travel or toe gripping can signal a poor match. Judge the motion during the actual walking distance, not while standing.
Fit with the exact socks intended rather than making an automatic size jump. If the sock compresses the toes or instep in the measured size, compare width, volume and model shape as well as length.
Tall enough for the planned exposure but low enough to avoid shin, calf or behind-knee interference during walking and crouching. Height must suit the child's proportions and clothing, not just puddle ambition.
Handles may help with pulling when used as designed, but they do not fix a narrow throat or insufficient instep volume. The foot should enter without force and the sock should remain smooth.