
Crocs
Toddler Classic Clog
clog · pivoting heel strap
Amazon link availableToddler shoe guide
Choose toddler pool shoes by the exact setting: splash pad, pool deck, changing area or locker room, with checks for fit, drainage and care.
Choose toddler pool shoes for the exact route, not for a generic idea of a pool. Splash pads add repeated soak-and-run transitions, pool decks involve short walks beside the water, and locker rooms add standing water, thresholds and changing stops. Venue rules, secure fit, drainage, coverage and a repeatable on-off routine should shape the shortlist; no outsole makes wet surfaces risk-free.
A pool visit may begin on a parking lot, cross a hot or rough approach, pause in a changing room, continue across a wet deck and end at a splash feature. Write the route in order and circle the places where the child will actually wear shoes. Some facilities require footwear off at the water’s edge; others have specific rules for splash areas or indoor decks. Those instructions outrank a shopping label, so check the current venue policy before deciding which features matter.
Then note who manages each transition. A caregiver may remove and replace shoes several times during lessons, while a toddler at a splash pad may keep one pair on throughout. Closure speed, a clear left-right routine and a place to hold wet shoes can matter as much as the upper style. This route map prevents a pair chosen for one surface from being assumed suitable for the whole trip.
At a splash pad, footwear may alternate between direct spray, shallow water and drier perimeter areas within minutes. Look at how the exact shoe drains and whether the foot remains centered after it is wet. Drainage holes are useful only when they do not create uncomfortable edges or admit troublesome debris for that setting. An upper that stays waterlogged may feel heavier; an open design may release water quickly but allow more grit inside. Neither tradeoff can be judged from the word “water” in a product title.
Create a small transition test away from the venue. Following the maker’s instructions, dampen the shoe, let the toddler take several ordinary steps on an appropriate supervised surface, then stop and refasten only if needed. Observe whether the heel shifts, the toes bunch, or the closure loosens. This is not a traction certification. It is a way to see whether saturation changes the fit before a busy public outing.
Pool decks vary: some are textured, some are smooth, and drainage patterns can create patches with different amounts of water. Product phrases such as non-slip or grip do not guarantee performance on every deck. Examine the outsole’s contact area, flexibility and condition, but pair that inspection with calm walking, close supervision and compliance with posted instructions. Worn tread, a sole clogged with residue or a shoe that rotates around the foot are reasons to pause, whatever the marketing language says.
Coverage on a deck is also a route question. If the child walks only a few steps between a bench and a lesson point, easy removal may dominate. If the route includes thresholds or an outdoor path, toe coverage and a more secure rearfoot may become more useful. Keep the choice tied to the actual facility instead of assuming that more material always means a better pool shoe.
A locker room adds benches, drains, door sills and the practical problem of dressing a damp child. Favor a closure the responsible adult can open fully and fasten consistently without balancing the toddler on one foot for long. The pair should have a clear storage plan so it does not disappear into a towel or transfer water to dry clothing. A mesh pouch or separate wet compartment may simplify the routine, provided the shoes still receive proper drying afterward.
Think about socks before arrival. If socks are used for the trip but not in the pool area, changing them alters the shoe’s internal volume. A pair fitted over socks can loosen when worn barefoot; a barefoot fit can become crowded when socks are added. Decide where the switch happens, label the setup in the swim bag, and check the shoe in the configuration used for each segment rather than improvising at the locker.
Give each candidate a simple route score rather than an overall “best” label. For splash-pad use, record wet fit, drainage and debris entry. For the deck, record venue acceptance, secure movement and the condition of the outsole. For the locker room, record opening width, fastening time and where the damp pair will be stored. Mark any unknown as “verify” instead of awarding a hopeful point. A strong result in one column does not erase a failure in another.
Fit remains a pass-or-stop gate throughout the scorecard. Check toe room, forefoot pressure, heel hold and closure range while standing and moving. If the shoe crowds one foot or repeatedly slips, it does not advance simply because it dries quickly. If two candidates pass, choose the one whose routine is easier for the person who will handle the transitions most often.
After the visit, empty loose debris and follow the exact care label. Open the closure, remove any component that the instructions say is removable, and position the pair for airflow. Avoid assuming that high heat, a washing machine or direct sun is acceptable. The next-use deadline matters: a shoe that is still damp when the following lesson begins may need more recovery time or a rotation, not a shortcut that could alter the materials.
Use cleanup as an inspection point. Feel inside for a folded liner, check openings for trapped particles, and compare outsole wear from side to side. Also look at the normal fastening position. A tab that now needs a very different setting may reflect growth, material change or an earlier fitting error. Recheck the pair dry before it returns to the bag.
Start with the toddler water-shoes collection, but filter every option through the route you drew. Keep only models whose current listing supports the intended environment, whose size and shape can be checked on both feet, and whose care routine fits the lesson schedule. The day-stage closure finder can help clarify who must operate the fastening and how often. Product details can change, so check the live listing before buying.
A useful pool-shoe decision ends with a setting statement: “This pair is for the splash pad and deck, worn barefoot, removed before entering the lesson pool, then rinsed and dried at home.” That sentence is more actionable than calling a shoe the best. It identifies the surfaces, wearer setup, transition and care plan while leaving room to change the choice when the venue or routine changes.
Reviewed model starting points
These model families link to Amazon listings. Check the selected size, width and color because availability and features can vary.
Crocs
clog · pivoting heel strap
Amazon link available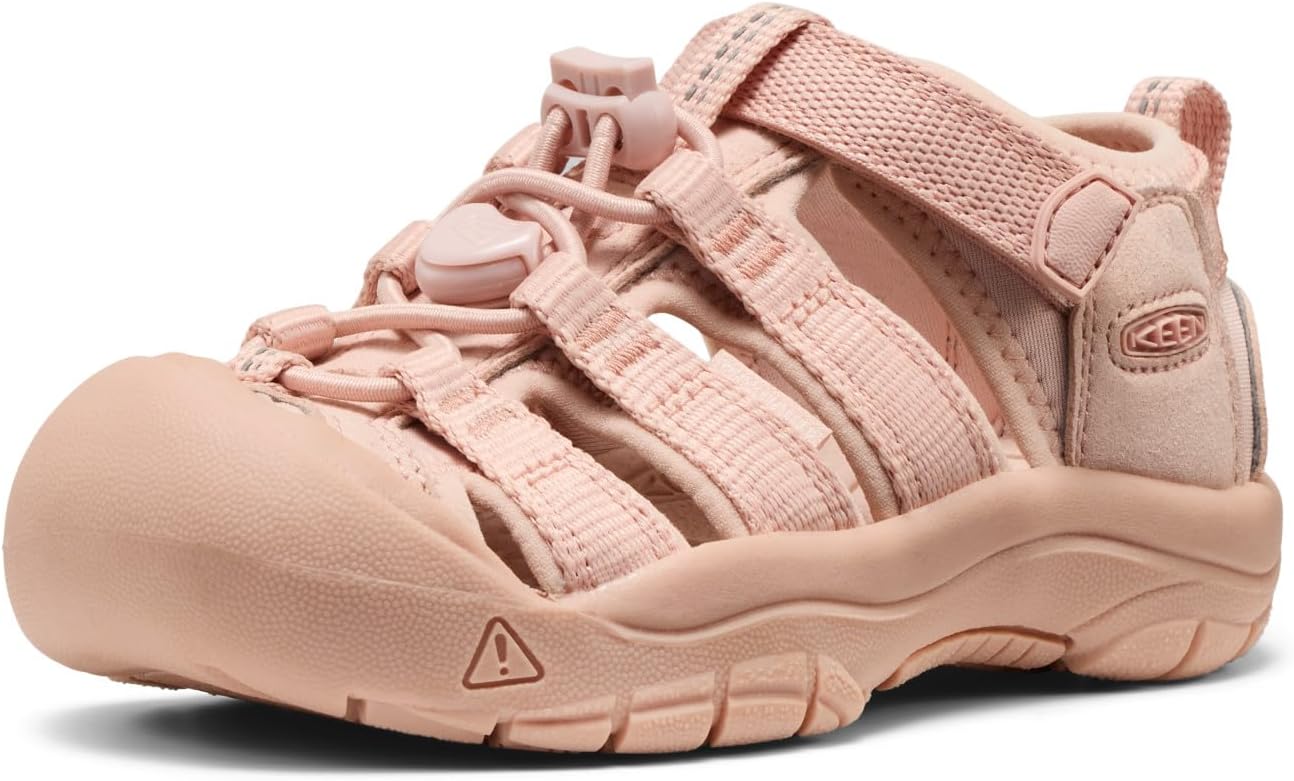
KEEN
closed-toe sport sandal · bungee laces; hook-and-loop strap
Amazon link available
KEEN
closed-toe sport sandal · bungee laces; hook-and-loop strap
Amazon link availableThey can overlap, but the settings emphasize different routines. Splash pads repeatedly soak the shoe and may introduce grit, while a pool deck may involve shorter transitions and facility-specific footwear rules. Evaluate the exact route.
No shoe can make every wet surface risk-free. Treat traction wording as a feature to verify, inspect the outsole’s condition, follow venue directions, supervise closely and encourage calm movement.
Use only a setup allowed by the shoe maker and suitable for the venue. Because socks change internal volume and hold moisture, check fit separately for the exact configuration used during each part of the trip.
Pack the fitted pair, any planned socks, a labeled place for damp footwear and the items needed for the maker-approved rinse-and-dry routine. Keep wet shoes separated from dry clothing on the return trip.